Fog, transparency and scissors
A friend of mine asked me some time ago to help him make a project he was preparing for the computer class he is teaching, a little more interesting. The project was a small flight simulator and, in particular the fluid dynamic calculations involved. So we came up with a list of visual effects to make the resulting program a little more interesting. Here are some guidelines about how to implement those effects in your games.
Fog
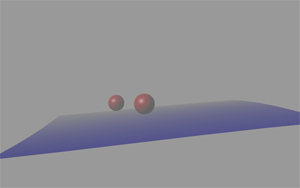
The first effect was fog. Actually how things look in the distance due to the water vapor in the atmosphere that changes its transparency. This is a very easy to achieve effect. OpenGL does it all for you. All you have to do is specify the fog parameters and you are done.
The parameters to set are very simple. First you specify how the fog behaves. For a realistic result we select GL_LINEAR. This means that the visibility changes linearly as the objects move further in the distance. Then we specify the colour of the fog. Usually this is a shade of gray but we can specify any colour creating the effect of colour smoke. The next two parameters specify where the fog starts affecting the scenery (GL_FOG_START) and where it reaches its maximum (GL_FOG_END). Beyond the fog end point object colour looses its meaning and objects are represented as mere shadows. Finally you enable the use of the fog effect.
Paste the following code into your project and experiment with the parameters to see the results.
// Fog Mode, almost natural, the further the object the deeper in the fog
glFogi(GL_FOG_MODE, GL_LINEAR);
// Fog Color, here we can simulate artificial fog effect (smoke?) with color
GLfloat fogColor[4] = {0.5f, 0.5f, 0.5f, 1.0f};
glFogfv(GL_FOG_COLOR, fogColor);
// How Dense Will The Fog Be
glFogf(GL_FOG_DENSITY, 0.35f);
// Fog Start Depth
glFogf(GL_FOG_START, 0.1f);
// Fog End Depth, nothing is visible beyond that limit
glFogf(GL_FOG_END, 80.0f);
// Enable GL_FOG
glEnable(GL_FOG);
Transparency

The next thing we implemented was the head-up display. This is a glass surface mounted in front of the pilot, which is used to project vital flight information right into the field of view of the pilot.
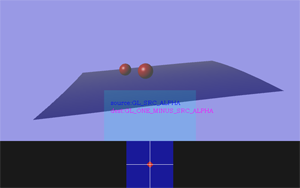
Displaying a transparent face is very easy in OpenGL. You are actually blending the face colour with whatever is already on screen. All you have to do is define how the colours will blend (blend mode) and the transparency of the second face. The first is achieved with a call to the 'glBlendFunc' function where you instruct how the source colours are interpreted and how the destination colour is computed. The alpha value in the colour of the face determines its transparency.
// set the panel colour
glColor4f(.0f,1.f,1.f,.15f);
// tell OpenGL how to blend the colours
glBlendFunc(GL_SRC_ALPHA, GL_ONE_MINUS_SRC_ALPHA);
// enable blending
glEnable(GL_BLEND);
// draw the panel
glBegin(GL_QUADS);
glNormal3f(0,0,1);
glVertex3f(-.35, -1, -1);
glVertex3f(-.35, -.15, -1);
glVertex3f(.35, -.15, -1);
glVertex3f(.35, -1, -1);
glEnd();
// stop blending
glDisable(GL_BLEND);
Scissor test
The next thing we are going to talk about is scissors test. This technique allows us to specify a rectangular area so that no all drawing outside it is clipped, hence the scissors in the name. This technique was used to overcome some problems we encountered in the flight simulator.
The first problem was clearing the background. We split the screen in two viewports. The top was used for the main view of the world, while the bottom was or the instruments. When we issued the 'glClear' command though to erase the background and fill it with a color it applied to the whole screen. For the top viewport that we were drawing first we did not mind, but the instrument panel colour was no good for the scenery.
In the example the scissor area is defined twice. Once to limit 'glClear' within the instrument panel and once to limit drawing within the stick position instrument area. This virtual instrument lets the pilot know the position of the control stick against its neutral position (the center of the cross).
Enough with the talking, here is how it is done
// assuming you want to clear the background
glClearColor(0.1f, 0.1f, 0.1f, 1.0f );
// specify the screen clipping area in pixels
glScissor(left, bottom, width, height);
// enable clipping
glEnable(GL_SCISSOR_TEST);
// draw whatever you want to draw
glClear(GL_COLOR_BUFFER_BIT);
// and finally stop clipping
glDisable(GL_SCISSOR_TEST);
Quite simple isn't it?
Conclusion
The techniques presented in this article are very simple and easy to implement in your projects. Yet I find them very good in making a game looking impressive and beautiful. One thing I have learned over the years is that the simplest techniques are usually the ones that make our games prettier.
You can download the sample project here.